Azure / SQL Server / Create DB on Azure
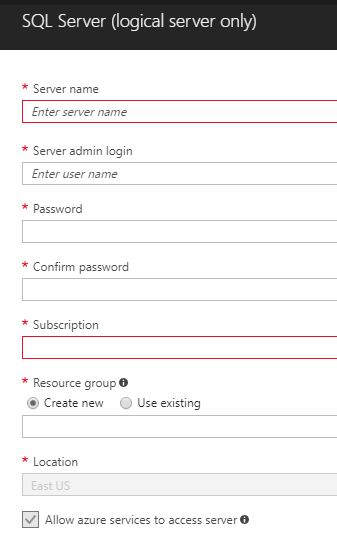
Posted by Barac in Azure, SQL Server on Oct 30th, 2017 | 0 commentsFirst of all, we need to login to Azure Portal and to create Logical SQL Server on Azure

Next, we need to put the name of the server, as well as server admin login account for this Azure Logical SQL Server.
After that, we can create a new one or to use existing resource group.

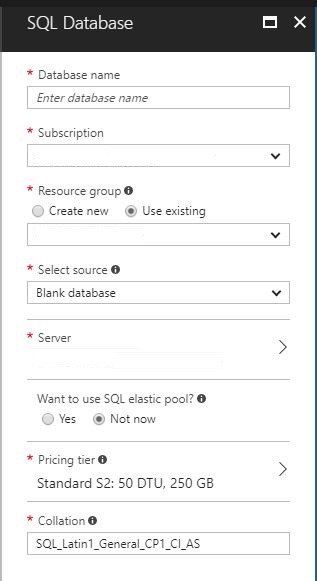
When we finish this part of configuration we can start with creating Azure SQL Server Database.
We need to define database name, and subscription we want to use for this SQL Database

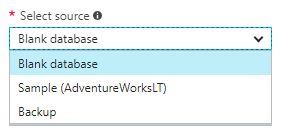
After that, we need to select source of our database (blank, sample, or restore from backup)

Than we need to choose previously created SQL Server or to create new one if we want.
Next step is to choose do we want to use SQL Elastic pool (I did not use this option for this example)

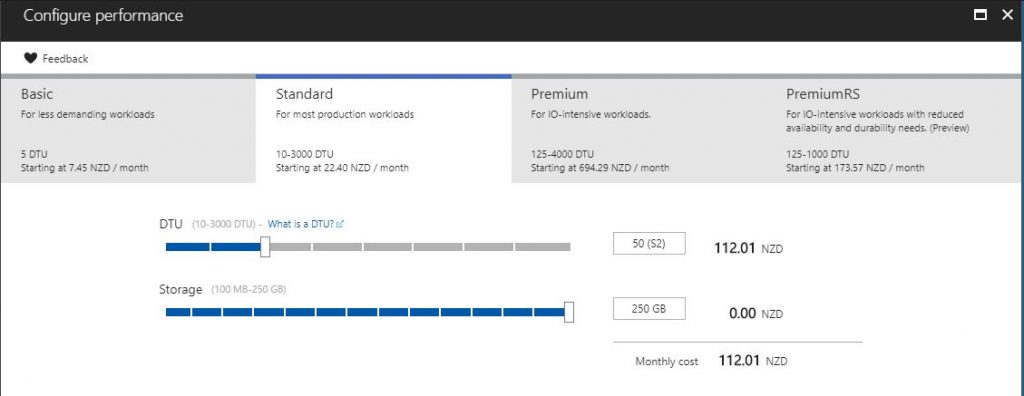
Following step is to choose Pricing tier we want to use. You can find out more about that here

That is all, now we have our SQL Server and blank SQL Database created.
Next step is to connect to our database using SSMS.
Similar Posts:
- Azure / SQL Server / Azure DB / Add Logins, Users, Permissions
- Azure SQL Managed Instance / Database Migration Service (DMS) / Online Data Migration / Migrate your database to Azure SQL Managed Instance
- Azure / SQL Server / Azure SQL Database Disaster Recovery / Orphaned Users / Different SIDs
- Azure / SQL Server / Rename an Azure SQL database
- Azure / SQL Server / Cannot open user default database (Login failed)


Leave a Reply